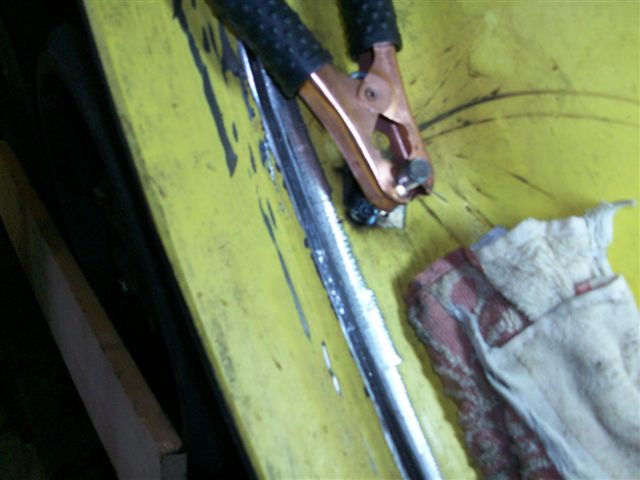
I had the welding done last saturday but I just got around to downloading the pics to my laptop. For the background story see the previous threads I started to describe what I was up against. http://talk.newagtalk.com/forums/thread-view.asp?tid=93146&posts=12#M662474http://talk.newagtalk.com/forums/thread-view.asp?tid=93278&posts=31#M663765 What I ended up doing was placing wet towels on the back side of the rim on the rubber right under the weld. I also had one laying right next to the bead as I laid it and then used it to cool the metal as best as I could after I laid a few beads. It got fairly hot at times as I got more impatient. It was a long process, welding a few beads down in the crack, letting them cool, weld a few more, and then a finish pass. The second bead I laid on pretty thick so I can grind it smooth later and paint over it. I ground a small patch when I started to see how it would look but did not finish it yet. I am glad it's done. I must say that I am in love with my Hobart 187(coming from an old stick welder). I found out fast that this was not the project to learn to weld vertically on so I did a few feet and then moved the tractor ahead to keep it fairly flat. Every time I did that I had to hook the batteries back up so it was a pain but it worked out better for the welds. Time will tell if I did it right and got enough penetration. It took a long time to grind the crack out too as it was about .325" deep all the way across. Started with the air cut off and a thin disk, then to the angle grinder with 1/8" disk, and then with a 3/8" disk. It was a lot of metal to move by grinding. Please excuse the crappy pics, the lighting in the shop is not great. P.S. Thanks to everyone for the good suggestions before I started!
 (2_21_09 063.jpg) (2_21_09 063.jpg)
 (2_21_09 064.jpg) (2_21_09 064.jpg)
 (2_21_09 065.jpg) (2_21_09 065.jpg)
 (2_21_09 066.jpg) (2_21_09 066.jpg)
 (2_21_09 067.jpg) (2_21_09 067.jpg)
 (2_21_09 068.jpg) (2_21_09 068.jpg)
 (2_21_09 069.jpg) (2_21_09 069.jpg)
 (2_21_09 070.jpg) (2_21_09 070.jpg)
 (2_21_09 071.jpg) (2_21_09 071.jpg)
 (2_21_09 072.jpg) (2_21_09 072.jpg)
 (2_21_09 073.jpg) (2_21_09 073.jpg)
 (2_21_09 074.jpg) (2_21_09 074.jpg)
 (2_21_09 075.jpg) (2_21_09 075.jpg)
 (2_21_09 076.jpg) (2_21_09 076.jpg)
 (2_21_09 077.jpg) (2_21_09 077.jpg)
 (2_21_09 078.jpg) (2_21_09 078.jpg)
 (2_21_09 079.jpg) (2_21_09 079.jpg)
Attachments
----------------
 2_21_09 063.jpg (25KB - 102 downloads) 2_21_09 063.jpg (25KB - 102 downloads)
2_21_09 064.jpg (31KB - 99 downloads)
2_21_09 065.jpg (37KB - 102 downloads)
2_21_09 066.jpg (47KB - 96 downloads)
2_21_09 067.jpg (49KB - 112 downloads)
2_21_09 068.jpg (43KB - 119 downloads)
2_21_09 069.jpg (64KB - 92 downloads)
2_21_09 070.jpg (47KB - 110 downloads)
2_21_09 071.jpg (39KB - 109 downloads)
2_21_09 072.jpg (29KB - 100 downloads)
2_21_09 073.jpg (37KB - 113 downloads)
2_21_09 074.jpg (47KB - 99 downloads)
2_21_09 075.jpg (37KB - 113 downloads)
2_21_09 076.jpg (25KB - 90 downloads)
2_21_09 077.jpg (26KB - 102 downloads)
2_21_09 078.jpg (34KB - 118 downloads)
2_21_09 079.jpg (75KB - 87 downloads)
|  Follow-up to 9400T Cracked Rim Welding w/ pics

